Check how ready your face is to apply makeup
takes 2 minutes to read
Text: Editorial staff of Makeup.ru February 20, 2017

To ensure your makeup lasts all day and looks flawless, you need to prep your skin in just 4 simple steps.
Thoroughly wipe your face and skin around the eyes with toner. This stage is very important to ensure that your skin remains healthy and does not experience problems due to the use of cosmetics. If there are particles of dust or dirt on the skin, then remaining between the skin and the foundation, they can cause irritation or the appearance of pimples.
Choose a toner that does not contain alcohol; to do this, check the composition on the back of the package for the absence of the ALCOHOL component. Even in small amounts, alcohol can cause irritation and tightness on the skin, which you don't want before applying makeup. You can read about other allergic reactions here.
If you have dry facial skin and flaking, which in the future risks being greatly emphasized by foundation, use a facial moisturizer. Take a small amount onto the inside of your palm, rub a little between your hands and apply to your face with light patting movements. This way you won’t overload your skin, but will distribute the product evenly across your face.
Makeup base can only be applied to areas prone to oiliness, for example, the T-zone: center of the forehead, nose, chin, and does not have to be used all over the face.
If you want to get a rested, fresh look, use a makeup base with a radiant effect before applying foundation. These bases can be applied either with your fingers or with a foundation brush.
The skin around the eyes is different from the skin on the rest of the face, it is thinner and more sensitive, so the eye cream must be specialized. Remember to moisturize the skin around your eyes before applying makeup. This will ensure that any products applied to this area will last longer and look good. For example, concealer on prepared skin will not be absorbed, gradually fading, and will not roll into wrinkles under the eyes.
Before you start applying makeup, immediately moisturize your lips with balm. And the moment you move on to your lips, they will already be fully hydrated and ready for any cosmetic products, including matte lipsticks. Blot the remaining unabsorbed product with a paper napkin, and apply pencils and lipsticks to the prepared lips. This will help avoid lip tightness, flaking and reduce lipstick absorption throughout the day.
If you want long-lasting makeup that will look natural and won't dry out your skin, follow the rules of makeup artists. We share their professional advice in this article.
- Why do you need to prepare your skin for makeup?
- Hydration
- Required funds
- Massage
- Review of necessary cosmetics
Why do you need to prepare your skin for makeup?
Every day, beauty sites tell us about fashion trends, but at the same time they never tire of reminding us that the main condition for quality makeup is good skin condition. Let's explain why.
If the skin is too dry, decorative cosmetics will emphasize fine wrinkles that appear due to lack of moisture (dehydration lines), and irregularities such as peeling.
On the fat one On the skin, makeup, as practice shows, lasts no longer than a few hours, and then “floats” along with a layer of foundation, blush and powder.
With dim skin is also a problem: even the most beautiful shades of decorative cosmetics will look pale on it.
Conclusion - skin of any type needs to be prepared for applying makeup. In this case, it will be more durable and will not require updating during the day. In addition, on prepared skin - fresh, with a natural blush - the makeup looks natural.
Hydration
Makeup artists who often work on shoots for glossy magazines and on the backstage of fashion shows say that the most important thing when preparing your skin for makeup is hydration.
Val Garland, makeup artist and international makeup director for L'Oreal Paris. © L'Oreal Paris
“The first thing I apply to a model’s face is not foundation, but a hydrating mist or serum, and then a cream,” says Val Garland, celebrity makeup artist and global makeup director for L’Oréal Paris.
Those who are concerned about the condition of the skin around the eyes (for example, it looks dull, tired, with noticeable crow's feet) can pre-apply eye patches. A hydrogel or woven base impregnated with hyaluronic acid and plant extracts will smooth the skin, add elasticity and radiance.
Preparing dry skin
If you realize that your skin is seriously lacking moisture, start preparing your face for makeup the night before. Use a sheet or cream mask containing moisturizing ingredients (aloe juice, hyaluronic acid). A sleeping pack night mask will work even better, which will restore hydrobalance all night.
Preparing oily skin
“In this case, proper cleansing and a toner with a mattifying effect are mandatory.
I don’t advise girls with oily skin to ignore toning at all, because this stage helps balance the pH and reduce the amount of sebum,” says Val Garland.
Required funds
To create the effect of flawless skin, in addition to masks and creams, you will need at least three products.
Primer
The purpose of the primer (depending on the specific product) is to even out the skin texture, reduce the visibility of pores, and provide a mattifying effect.
Concealer and corrector
For perfect makeup you will need concealer or corrector © L’Oreal Paris
There is a difference between these two products. In short, this is what it is.
Concealer - lighter in texture, designed to give the skin radiance and hide minor imperfections. It can be applied over foundation. The palette of shades is only natural.
Corrector - quite dense, less plastic, well masks imperfections such as pimples and redness. It must be applied before foundation. As for shades, the corrector can be green, blue, pink, peach, yellow. Why there is such diversity, we explain here.
Concealer
The foundation is also selected according to your skin type and condition.
For aging skin Dense textures should be avoided so as not to emphasize wrinkles. The most suitable options are fluids and liquid foundations with anti-aging components.
For oily and problematic — it is better to give preference to BB and CC creams: they will make the complexion even, disguise imperfections, and provide hydration.
If the skin is normal, without any problems, you should pay attention to cushions and light emulsions. Such products add radiance, moisturize, and nourish.
Massage
For lazy beauty enthusiasts, makeup artists have saved one more life hack - self-massage.
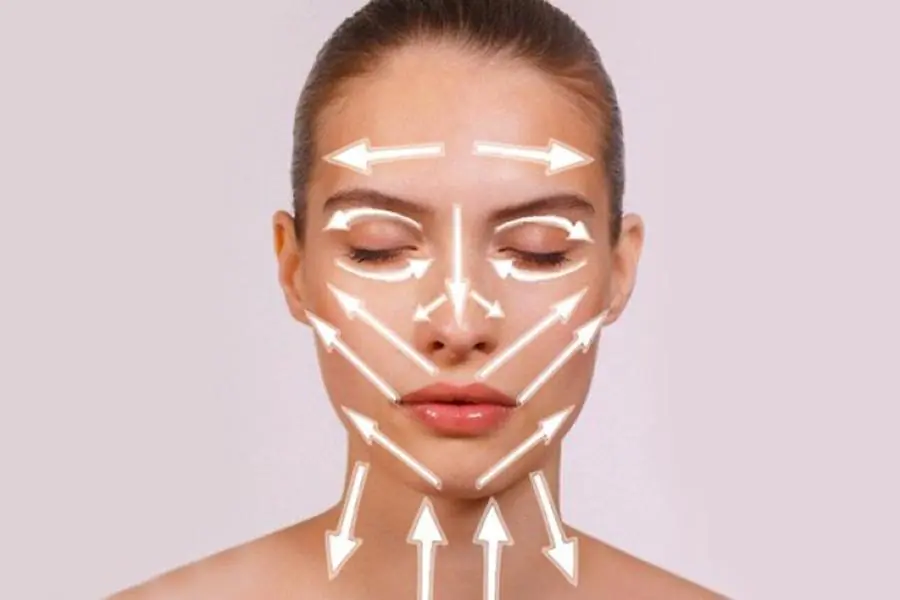
“You can use special tools such as rollers. Or you can master the simple movements of lymphatic drainage acupressure,” recommends Val Garland.
Here is a massage scheme in case you need to get rid of puffiness under the eyes.
Review of necessary cosmetics
Sheet mask “Moisturizing + Aqua Bomb” with pomegranate extract, Garnier Contains hyaluronic acid for intense hydration. Pomegranate extract is responsible for antioxidant protection.
Mask for the skin around the eyes in patches Advanced Génifique Light Pearl, Lancôme in just 10 minutes it improves the condition of the skin around the eyes: moisturizes, refreshes, reduces the appearance of fine wrinkles and signs of fatigue.
Concentrated anti-wrinkle serum to improve skin firmness, tone and elasticity Hyalu B5 La Roche-Posay with madecassoside, two types of hyaluronic acid and vitamin B5, it provides the skin with powerful hydration and works to reduce the signs of aging.
Moisturizing cream for dry and very dry skin of the face and body, CeraVe - a hypoallergenic, non-comedogenic product with ceramides and hyaluronic acid helps the skin retain its moisture supply and strengthen the hydrolipid barrier. Non-greasy, non-sticky texture is comfortable to use. No fragrance.
Creamy Eye Treatment with Avocado, Kiehl’s Due to the avocado oil in the composition, it guarantees effective hydration. Warm the product slightly in your fingers before applying.
Color-correcting face primer Infaillible Primer, 02, L’Oréal Paris with a “breathable” texture, it is evenly distributed over the skin, evening out the relief. Green pigments help correct redness and provide an overall refreshing visual effect.
I want to cover such a simple topic as the correct application of foundation, or rather, preparing the skin for makeup. I set out to study this issue after reading numerous negative reviews on the Internet about various foundations, fluids, creams and other foundations. And I came to a simple conclusion: no, girls, it’s not the products that are bad, it’s your knowledge that’s lame. Knowledge about preparing the skin for applying foundation. Because even the best, most expensive, very luxurious and super innovative foundation simply will not lie on the skin if it is not prepared first. And the worse the condition of the face, the more preparatory work needs to be done. These are the realities.
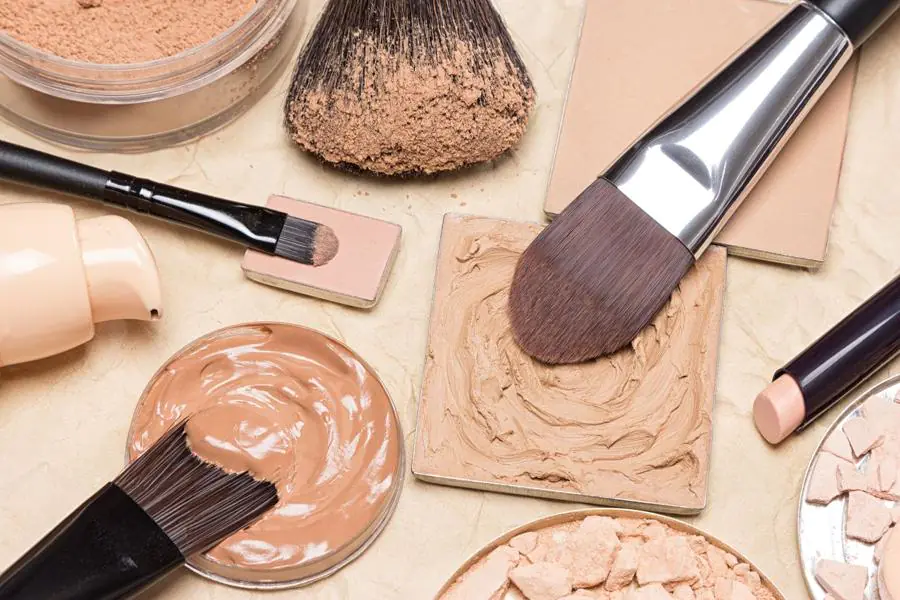
This article will not talk about finding and choosing the ideal foundation. We assume that you already have a suitable bottle. The question is what to do next with this bottle. And I will not touch on the aspects of masking the imperfections of very problematic skin; we will talk about the “average” face. So here's the step by step process.
The most important stage: cleansing, moisturizing
What are these negative reviews about foundations that are most often found on the Internet? I'm sure you've read them more than once too. This is a criticism like: “Emphasizes dry skin, flaking, does not hide redness. The conclusion is a very bad tone.” Such statements just make me sick. And if such comments are still found on the Internet, it means that not enough explanatory work has been done about what to do before applying foundation.
Just keep in mind: any foundation hides no more than 30% of skin imperfections. There are denser, heavier products - they can “photoshop” up to 70% of imperfections, but they are not recommended for every day. Therefore, our direct task is to remove as many imperfections as possible before applying foundation. And for this, the skin should:
- Clear.
- Moisturize.
- Conceal with additional means, if necessary.
Exactly in this sequence. Main - Before applying foundation, get rid of any redness, peeling, dryness, etc. as much as possible. Think of your face as a canvas. What artist would paint on an uneven canvas?
What means to use is up to you. What suits you, what you are used to. Just keep in mind a few tips:
1. If you use micellar water for cleansing, do not forget to rinse it off. The micellar should always be washed off - this colorless water creates a disgusting sticky feeling on the skin. And this is a solvent. It dissolves not only dirt on the skin, but also all the products that you will apply next.
2. Tonic must be alcohol-free.
3. Allow at least 10 minutes to absorb any moisturizer before applying the next layer. We used cream, serum, oil - wait 10 minutes. If you see that the product is not completely absorbed, blot it.
Facial oil before applying foundation
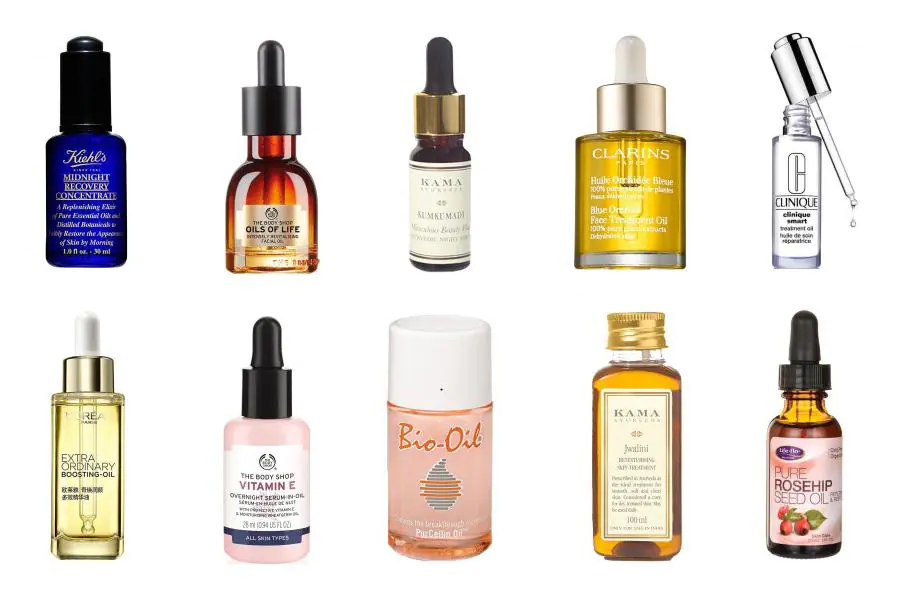
Can oil be used when applying foundation? How? For what? Which? In what order? What is the final effect? There are many legends and conflicting opinions surrounding this issue, let’s figure it out. I will highlight this aspect separately, because on the one hand, oil is one of the stages of preparing the skin for makeup, and on the other hand, it is a means for applying makeup. Let's consider all methods of application.
1. Mix oil with foundation
- Option 1: drop a little foundation onto your hand, add a couple of drops of facial oil, mix and apply the mixture to the skin as usual.
- Option 2: Apply foundation or concealer to the face with strokes, drop a couple of drops of oil onto a damp cosmetic sponge, and blend.
What is the benefit of adding oil to tone?
- If you want to lighten, dilute the matte finish of the foundation, make the coating lighter, more radiant, more natural.
- If you want easier application, distribution, shading of the foundation.
My opinion on this matter. I haven’t tried it, and I’m not going to try it. It is better to choose a foundation that is comfortable, suitable in color and consistency, than to dance with tambourines around an unsuitable one.
2. Apply oil before makeup
Together with the rest of your skincare cosmetics: cream, mask, serum, toner, you don’t have to apply everything on yourself at once. The main thing is to achieve the main goal: remove peeling, redness, nourish the skin, moisturize. If one product is enough for this, great, if more is needed, ok.
My opinion on this matter. Oil as a preliminary part of care is the most reasonable option, if you take into account two important conditions:
- The oil is chosen that is suitable specifically for your skin type, and this is not an easy task. Wide variety, hundreds of varieties of pure mono-oils, regardless of manufacturer. But there are also ready-made mixtures from different brands. With such a choice, it’s easy to get confused. If you have found “your” oil, I can only congratulate you. Personally, I haven't found it yet.
How to determine that a particular oil is right for you? The criterion is extremely simple: it is comfortable to live with, you rub a couple of drops into the skin and they are absorbed without a trace, leaving behind only a feeling of softness and moisture. If this consistency creates a film on the face, an oily sheen, a feeling of stickiness and disgust, then there is no need to use such a product anymore. Guided by this rule, you should choose all other skincare products. And it would be a mistake to think that face oil is only for very dry skin to remove dryness and flaking. A suitable bottle can be selected for absolutely any skin type and for any defect. - Even with the perfect oil, it takes time to absorb; allow at least 10 minutes for this process and only then apply the next product.
3. Use oil instead of highlighter
Kind of a life hack. The finishing touches to the finished makeup. If you want to replace your usual highlighter, rub one drop of (appropriate!) oil between your fingers and apply it to the desired areas on top of the foundation.
My opinion on this matter. Personally, the shine of the foundation is enough for me, I don’t need more.
Final elimination of defects
Have you completed all the preparatory procedures? Let's see what happened. Is your skin smooth, nourished, even? You did a great job - now you can pick up a tube of foundation. No? Or is there any doubt that all this beauty will last long? It’s sad, of course, but everything can be fixed. The next stage is the “foundation”.
If there is a suspicion that this area will soon become shiny, dryness will appear here again, there are too many blackheads here, there is a pigment spot here, and here the acne has not gone away. means “we are building the foundation.” It's time to get down to business makeup base. Or the base. Or color correctors - the name may be different, but the purpose of the product is the same - to disguise imperfections before applying foundation. I will not give recommendations on which bases to select, because recommending brands in this case is a thankless task. I will only say that the basics can be found for any shortcoming.
You also need to take into account that CC and BB creams are also considered bases, but they are self-sufficient, after which you do not need to apply foundation. And if you are lucky and don’t need to mask anything, then a regular transparent silicone base without effects will increase the durability of your makeup. If the day promises to be long, then with a colorless “classic” base the foundation will last longer, and there will be no need to refresh the tone.
Applying foundation: tools
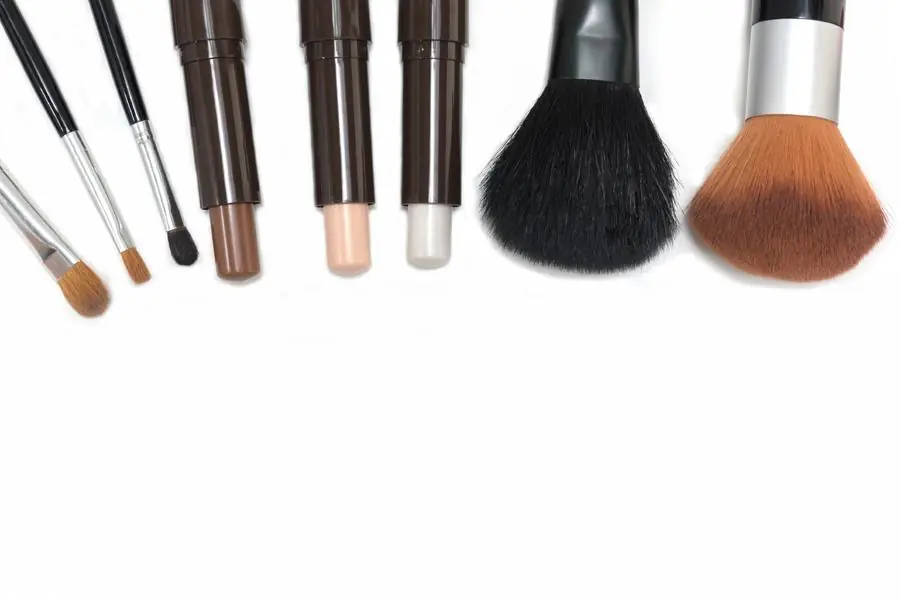
We have carefully and conscientiously prepared for tinting, now let's figure out what tools to use. The choice is small: synthetic brushes, sponges and your own fingers. Everyone chooses for themselves which tool to “draw” with, let’s take into account only a few nuances and recommendations:
1. Makeup brushes – the most expensive and difficult tool to choose. If you have found a comfortable and high-quality brush, rejoice. These accessories are especially useful if you have long nails and applying makeup to your face with your fingers is difficult. What you definitely shouldn’t do is buy all sorts of fakes and low-quality stampings at flea markets like “Everything for one dollar”, Fix price and “stores with products of the Chinese industry that smell dubiously.”
2. Sponges. There are not many requirements for them. The sponge should be soft, conveniently shaped, and quickly return to shape after compression. The sponge is especially useful for the following manipulations:
- Blending concealer under the eyes. The soft structure of the sponge will make this process as accurate as possible and ensure uniform coverage.
- Remove excess foundation. Wet the sponge, squeeze it out and walk over the face with patting movements. At the same time, refresh your tone.
3. Fingers. The most effective “tool”, by the way. Apply any products to the face using pads, stroking and tapping movements. Do not stretch the skin.
Final stage
A multi-layered “cake” of cosmetics has already formed on the face, and still this is not the end. Brief program: apply concealer under the eyes and make a couple of dotted strokes in those places where “it’s not ok yet.” It is important to remember that concealer is applied after foundation, and not vice versa. You can do without a final spot concealer, but under the eyes - only this product is necessary, because concealers are mainly designed for makeup of the area under the eyes. The shade should be chosen very carefully - to match the color of the skin, or better yet, a tone lighter.
And at the end of the day, some optional but decorating touches: powder, blush, contouring (sculpting), highlighters and bronzers. I will not consider these procedures in detail - because this is already a topic for a separate article, and we wanted to consider the question of what to apply before foundation. And they seem to have considered it.
What conclusions can be drawn? The fewer funds from this list we need, the better. Both for our wallet and for our nerves. Therefore, if there is an opportunity to remove at least something from this list, remove it. In an ideal universe, a girl applies CC cream to her bare face and goes out to decorate the world. When in the mood, her cosmetic chain looks a little more complicated: cleanser, moisturizing cream, foundation, powder. Any means are good if you understand what their role is.


