Halloween is a very bright, interesting and fun holiday. On this day, many people dress up as mysterious and scary characters or some celebrities. Of course, the makeup also needs to be selected appropriately. For example, not everyone knows how to make an artificial wound. Although in reality there is nothing complicated about it. Almost every girl has everything for this in her house. Well, a man can buy everything he needs without any problems.
How to make an artificial wound quickly and inexpensively?
So, what will you need for this? Firstly, what the skin around the “wound” will be tinted with. Foundation and eye shadow are perfect for this.
Secondly, this is PVA glue, thanks to which you can easily create volume and imitate ripped skin.
To create the effect of fresh blood, nail polish is also useful. If you are thinking about how to make a fake wound, take several shades of red at once.
For greater authenticity, you can also use cosmetic fatty oil. This will make the wound look even more realistic. In a word, everything is very simple. The main thing is to try hard when drawing fake wounds for Halloween. Step-by-step instructions make it possible to verify this. So where to start?
The first point is volume
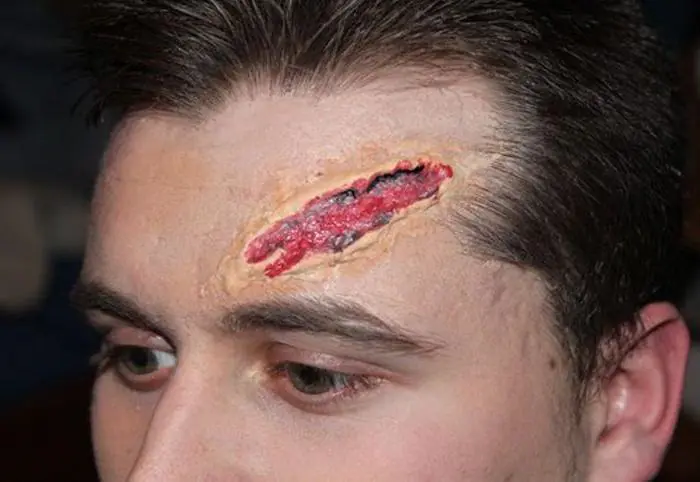
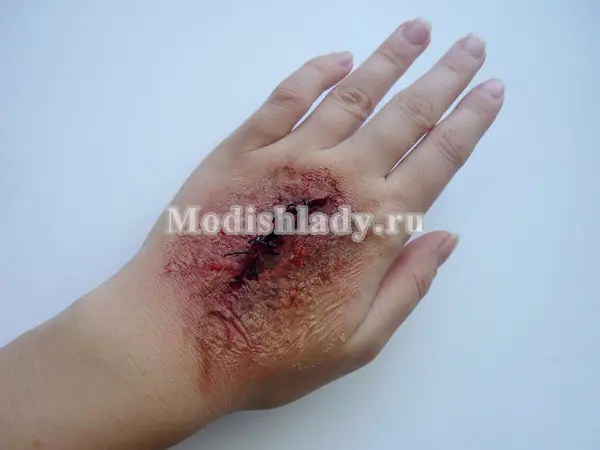
First you need to decide what your “masterpiece” will look like and how long it will be. Once the decision is made, we begin to figure out how to make an artificial wound so that we get exactly what you want.
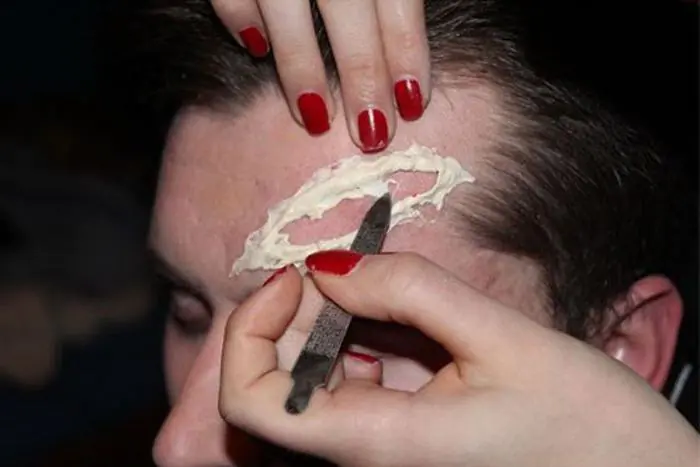
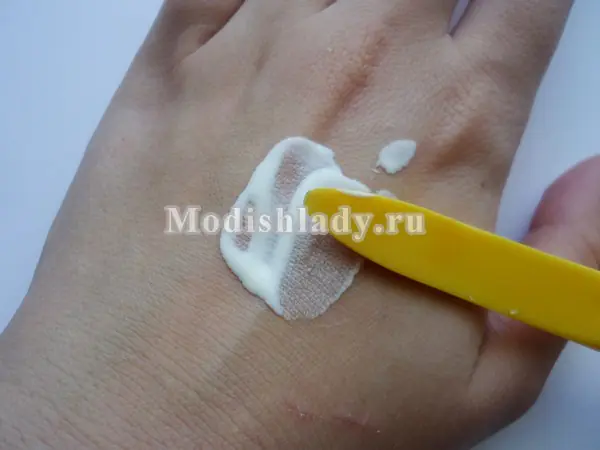
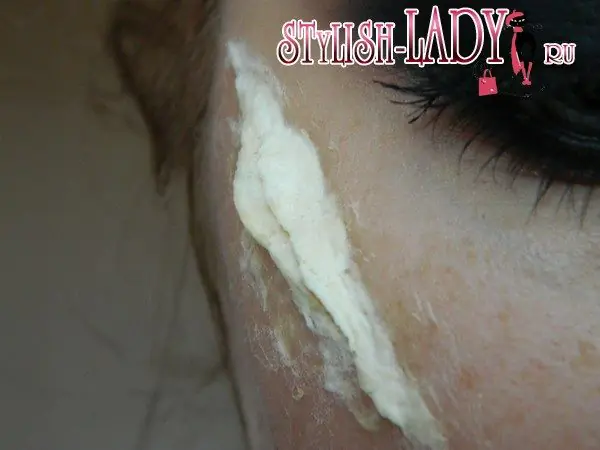
First of all, you need to apply two thin stripes of PVA glue.
Once it dries a little, the edges of the drawn lines are carefully smoothed with a fingernail. Then all that remains is to wait until the glue dries completely.
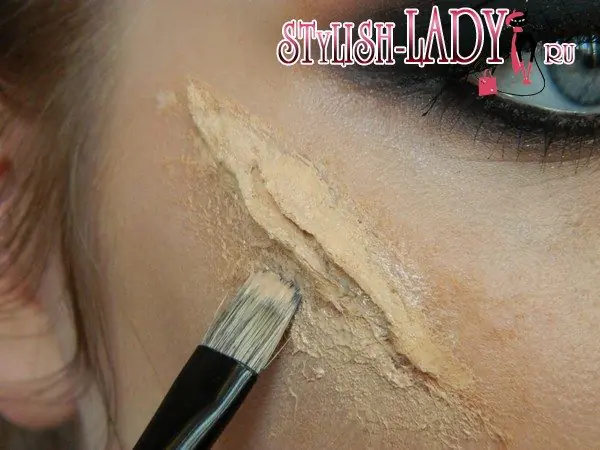
Point two: tinting
Once the base is ready, you can proceed to the next stage. How to make an artificial wound at home so that it looks as realistic as possible? Here you will need tinting.
Let's look at a specific example. Let's say you don't know how to make an artificial wound on your palm. It's very simple. The entire palm needs to be tinted. Otherwise, a certain painted area will stand out too much.
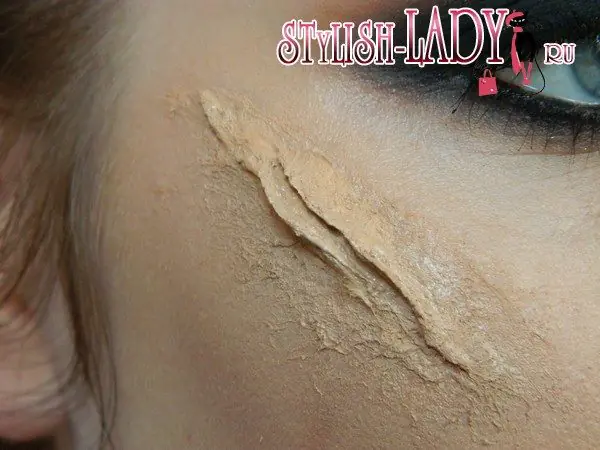
As soon as the future wound is tinted, the color of PVA becomes not so white at all. Next, this area is covered with cosmetic body oil. Well, now you can create by adding a variety of colors!
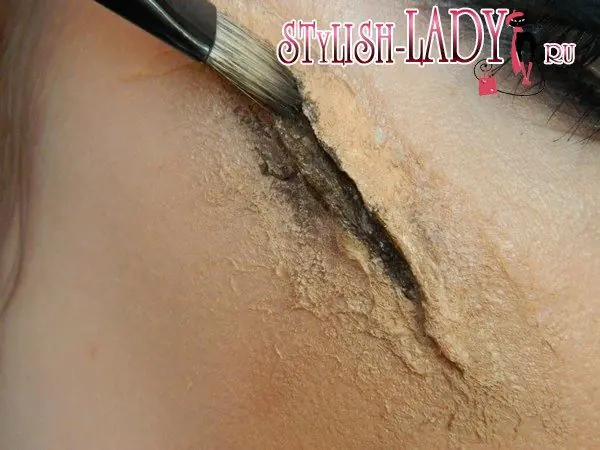
By the way, oil makes PVA a little limp. Therefore, in the middle the “wound” will need to be slightly “torn” with a cotton swab.
A few more details
You shouldn’t admit to your friends and acquaintances how you managed to create such a plausible wound. Let them wonder what was needed for this. It is unlikely that any of them will understand that special materials are not needed. You will only have to use what is always at hand.
Think, of course, about the fact that you may need some additional materials. Somewhere, a “wound” may need to be corrected using colorless eyelash glue and red glossy lipstick. Brushes for applying makeup, of course, will also be needed.
Working with glue will require care
Thus, it seems absolutely clear how to make an artificial wound at home. But don't miss the most important point. If you want to achieve the most realistic effect, you need to work very carefully, especially with glue. For example, in order to speed up the drying process, you can use a hair dryer. However, you should not dry it with a hot air stream. The glue may dissolve. Only cold flow is used.
After drying, be sure to check whether the glue has dried well. If it doesn’t stick to your fingers, then everything is fine! We can continue working!
After applying the foundation, the glue should be lightly pressed down. But the main thing here is not to overdo it. The glue may not only lose its original shape, but even break.
And after this, flesh shadows are applied, on which other colors will fall. Which ones?
Experiment with colors
To create a “wound” you may need a whole palette of eye shadows. Flesh ones, for example, are useful for shading your foundation. Therefore, they must be selected individually - according to skin color.
Pink shadows are the basis for the “blood”. They cover all the skin outside and inside the scar. In addition, such a “wound” looks irritated. The effect is very realistic. The shadows need to be lightly shaded around the edges. They should practically merge with the skin.
The contour of the scar is outlined with brown shadows, the corners and cracks are painted over, and the “wound” is shaded. You can also take a flesh color, a couple of shades darker than your skin.
Black shadows will be needed to create the effect of indentations. They sketch small depressions.
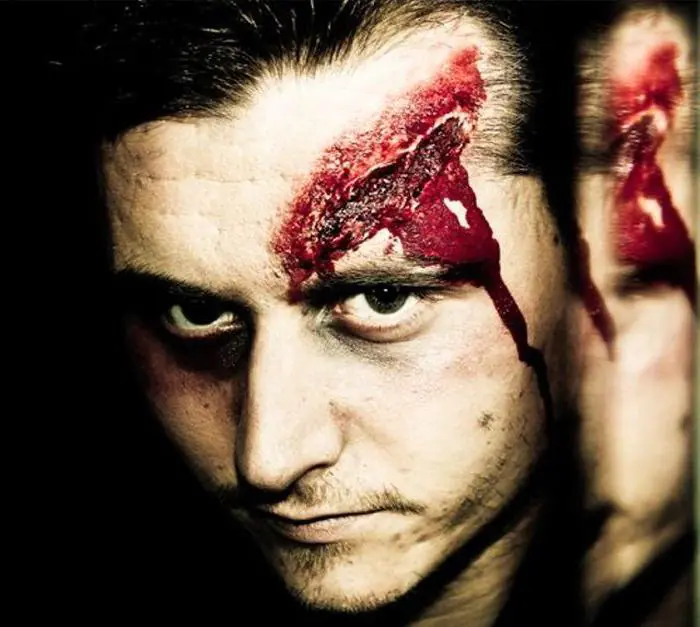
Well, the last step is red lipstick and nail polish, applied inside the wound and on the glue. It turns out very intimidating.
So, don’t think too hard about how to make a fake wound for Halloween. Just a little time and our advice - and you will get a great result!
Today you will learn how easy it is to make a bloody wound or cut yourself.
For this you will need:
- any paints, be it gouache, watercolor or professional makeup: red, brown, blue, bloody;
- special latex for makeup or PVA glue;
- cotton wool;
- glue stack;
- paint brush;
- water;
- foundation;
- alcohol;
- black thread;
- sharp and thin needle;
- artificial blood.
First you need to degrease the area where your wound will be located. We wipe the skin with alcohol. Please note that you need to work quite quickly so that the glue does not dry out and eventually roll off during the process.
We apply the material that you have chosen for work (let there be glue) to the skin in a thin layer. Immediately try to make the edges as thin and transparent as possible. This area should correspond to the future size of the wound.
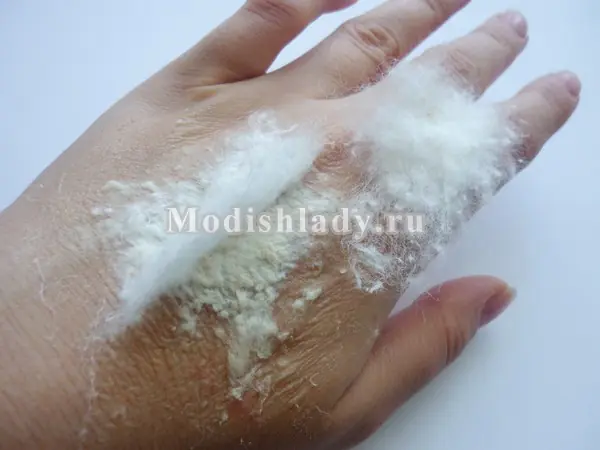
We tear off a piece of cotton wool and make a plate out of it, the inside of which will be thicker. The edges should blend into the skin. The realism of your wound will depend on this stage. Glue the blank to the hand.
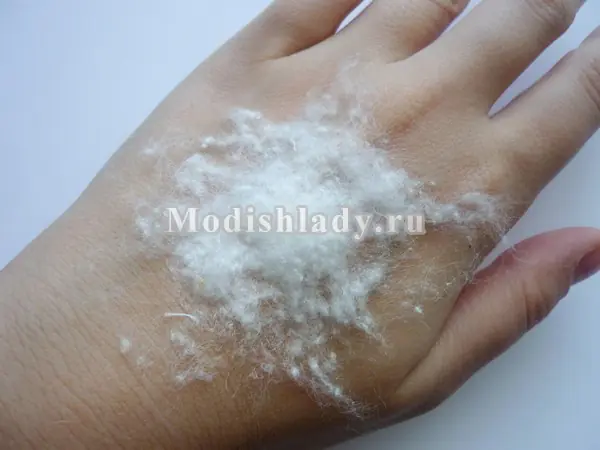
We completely cover the cotton pad with glue. In this case, it is better to work with a stack. It will allow you to evenly cover the entire surface and saturate the cotton wool if you press it down.
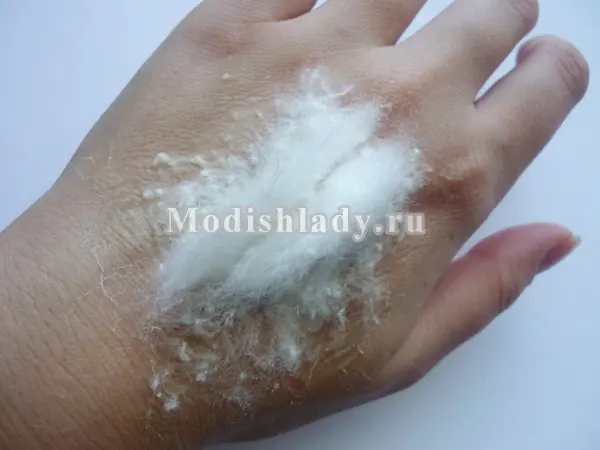
Now you need to build a skeleton for the future cut. It will consist of two cotton walls. Choose the length of these walls based on the size of the wound, but let the height be about 3 cm. If you want to make a minor cut, then about 2 cm. One edge should be as thin as the cotton pad that we made under the wound. It is with this edge outward that we attach both walls. There should be a slot inside. We connect the ends of the walls.
These walls need to be completely saturated with glue and a real wound must be created. The transitions between the outer walls and the surface of the hand should be smooth, and the upper part of the walls should be very thin, like skin. We achieve this effect by squeezing the cotton wool with our thumb on one side and the stack on the other. This entire workpiece should freeze properly. If you are working with PVA, this process will take a little longer.
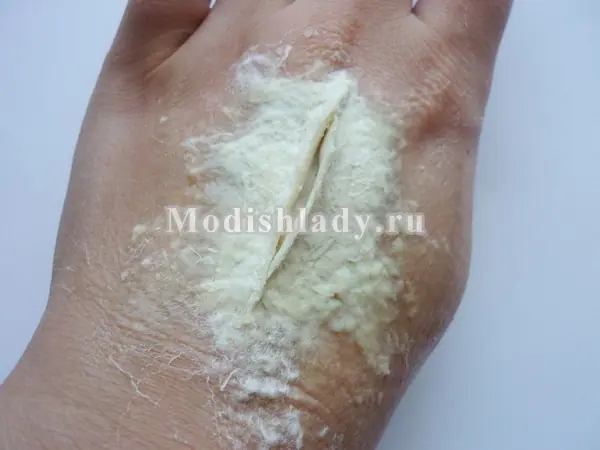
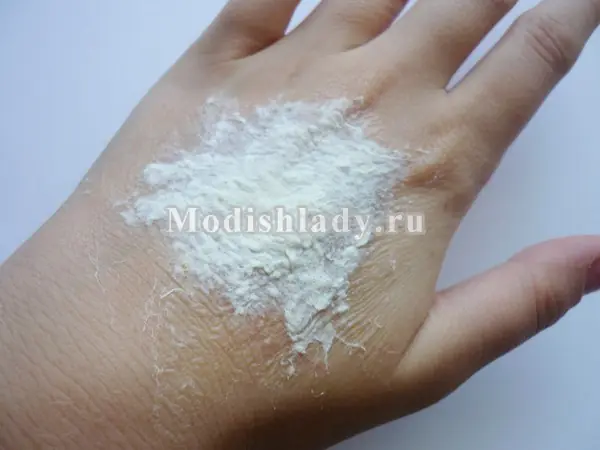
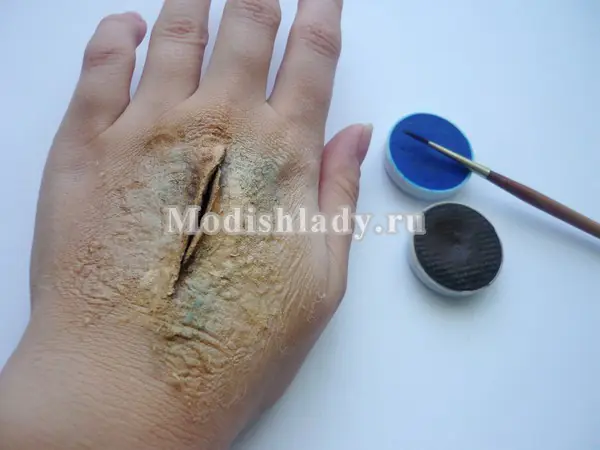
We select a foundation that matches the color of the skin and completely cover the entire workpiece with it, moving on to the body. We also allow the surface to dry completely.
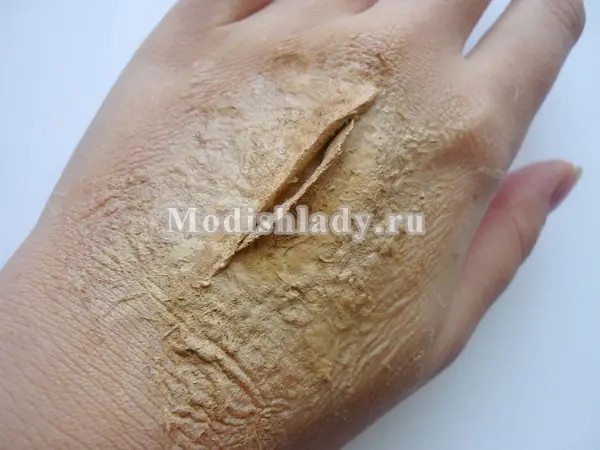
Now let's begin the most interesting process. We paint all the recesses that are in our workpiece with brown paint. This will be the cut itself, somewhere under the base, etc. We make the cut saturated, and in other places we shade the paint. We just apply the paint not in liquid form, but with a consistency like sour cream, so that the surface dries faster and the colors are richer. We tint it blue in several places, as if this wound was caused by a blow, and a bruise has formed.
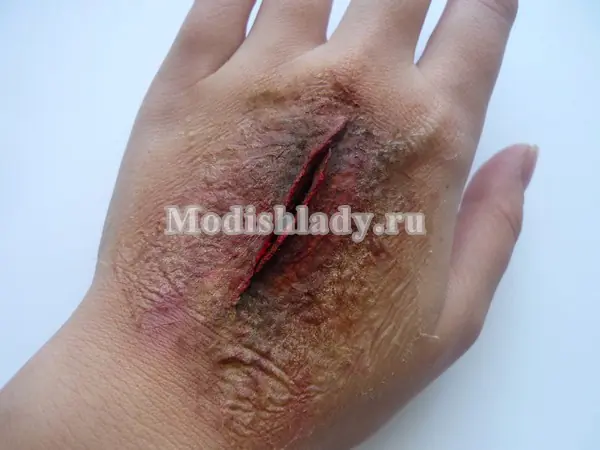
Cover the entire surface with bloody paint. If it is not there, then mix red and brown, and then work with it. We cover the bulges of our wound with red paint.
In fact, decorating the outside may not be that scary. You can do the same thing in a small diameter around the wound, showing that there is inflammation, but you definitely need to properly decorate the inside.
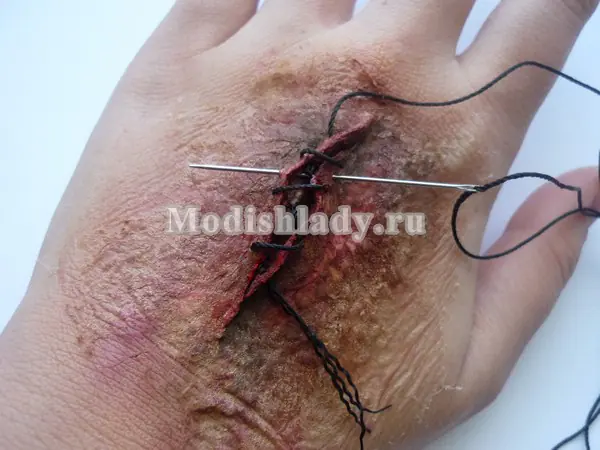
For a more frightening effect, you can sew the wound with black threads, and then cut some of the stitches. Pierce the needle somewhere in the middle of the walls so as not to touch your skin. Do not tighten the seams at all, unless this is by design. When you sew, hold the workpiece with your finger so as not to tear it off.
After you have finished sewing, you need to paint over the places where the thread comes out of the leather with brown paint, as if there was dried blood there.
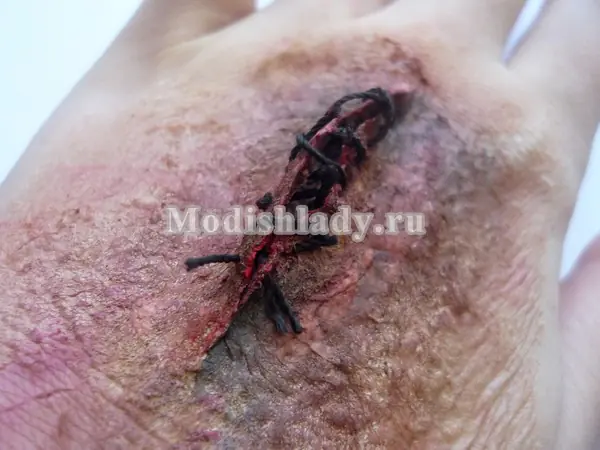
We fill the wound with blood, smear it on the skin, threads and make it look as if it is flowing out of the wound. Blood can also be made at home from water, paint and gelatin, bringing it to the desired consistency (1-1.5 liters of water + 40 g of gelatin. Boil water, dissolve gelatin in it. Mix red paint or food coloring until the color is obtained, closest to the color of human blood).
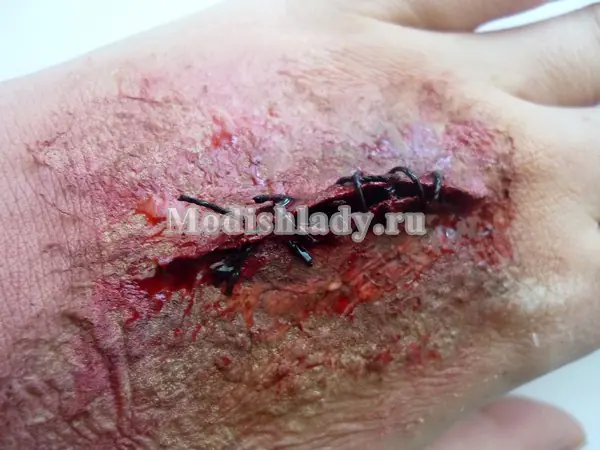
This is the kind of horror you can now do on your own. These wounds will definitely look scary at a themed party.
If you are preparing for a Halloween themed party, then this master class is just for you. With this makeup you can surprise anyone and even scare them.
To create an artificial wound you will need:
- PVA glue or special makeup;
- alcohol;
- cotton wool;
- foundation;
- blue, green shadows;
- stack;
- artificial blood;
- brushes for makeup, tone and shadows;
- brown, red face painting.
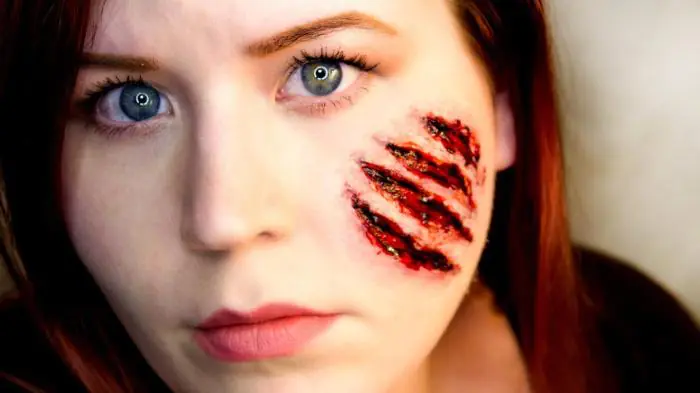
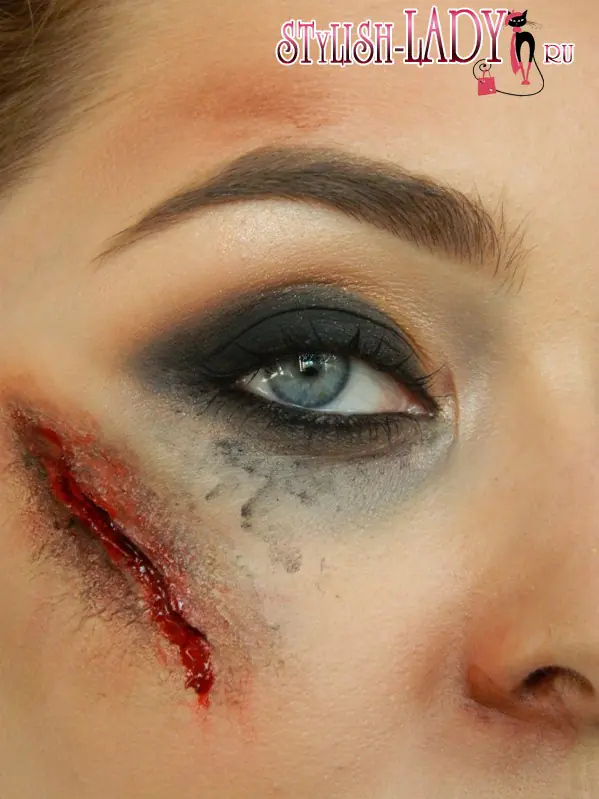
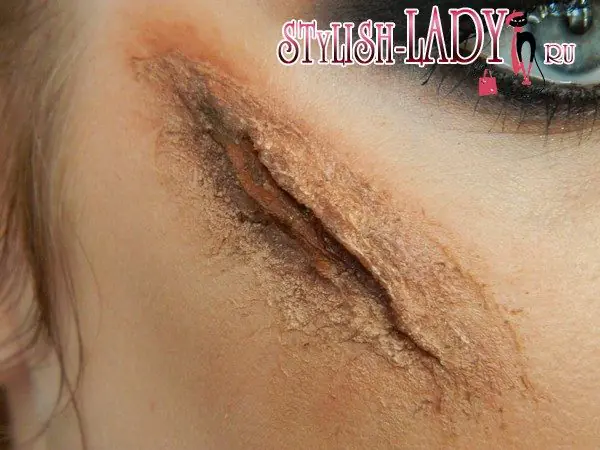
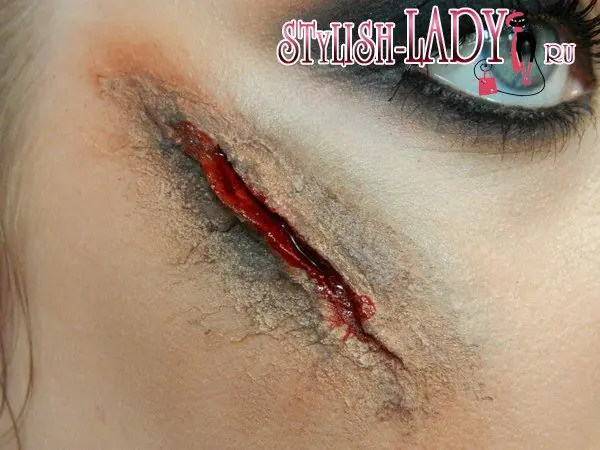
You can make a wound on any part of the skin. For the master class, the cheekbone under the eye was chosen as one of the most convex places on the face. When choosing where to make a wound, imagine that it actually happens and where it could actually be. In this case, it is assumed that the cheekbone was hit.
A smokey eye with black shadows is ideal for this look; you can find a tutorial on how to create it here.
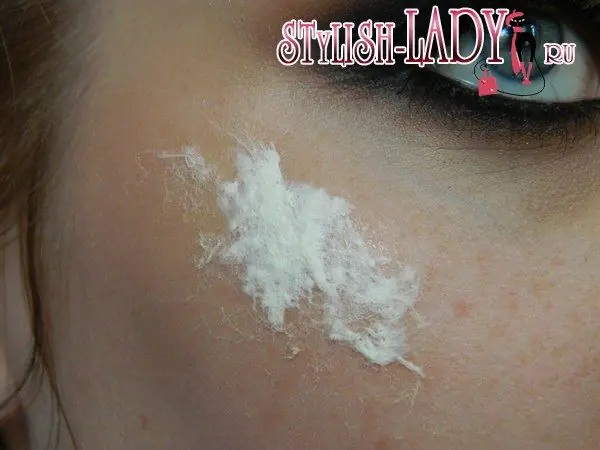
The area where the wound will be should be degreased with alcohol and a cotton pad. During this procedure, it is best to close your eye. After this, apply a thin layer of PVA glue or special silicone makeup to the skin. It is best to work with a stack, since the brush will deteriorate after such procedures and during the work it will be uncomfortable to use, since the makeup will dry out.
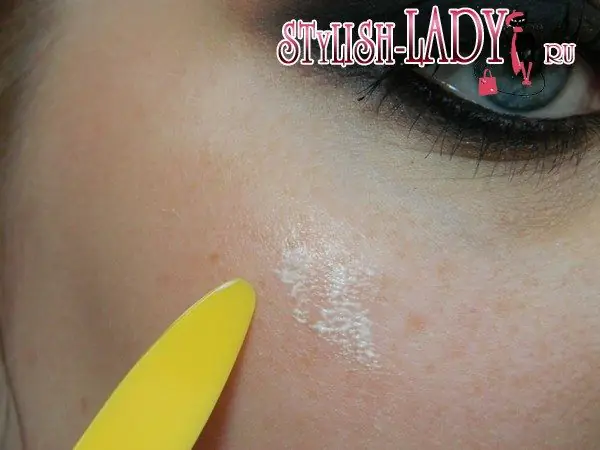
We decide in advance what size the wound will be and attach a thin layer of cotton wool with smoothly fading edges to the glue. We fix the cotton wool with glue.
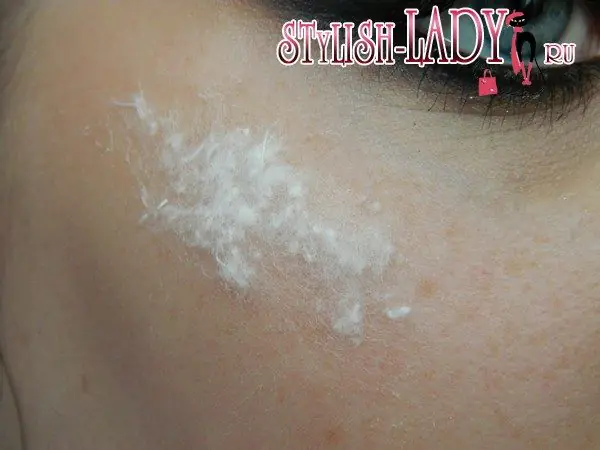
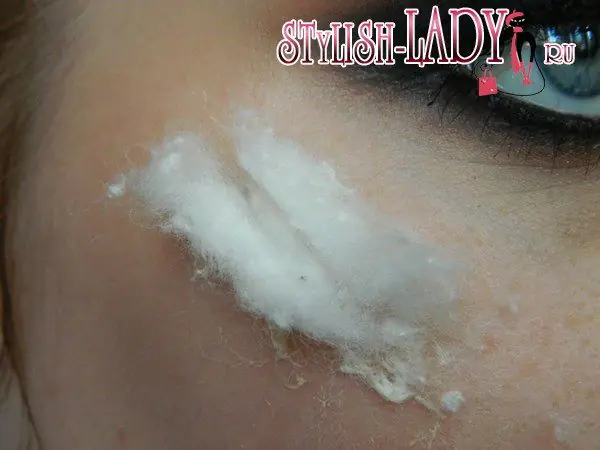
While the glue has not dried, we need to make two small walls out of cotton wool and secure them to the prepared surface. These walls will determine the length of the wound. We fasten their edge, leading it to nothing along the skin. The distance between the walls should be very narrow and the walls as thin as possible. We cover them with glue and shape them using a stack and fingers. Position the wound so that it looks real.
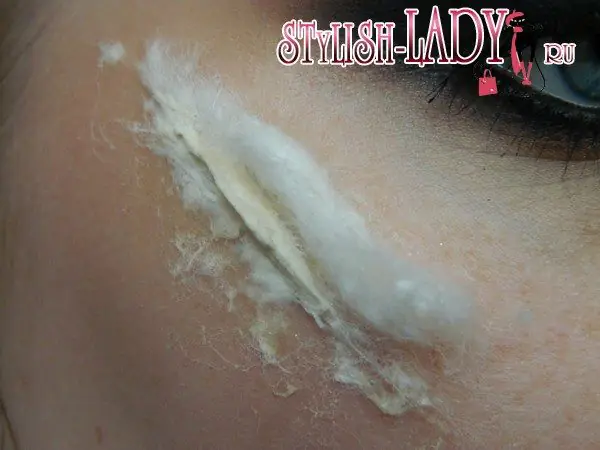
We made a mold for the wound. Now you need to wait for it to dry completely and you can start painting.
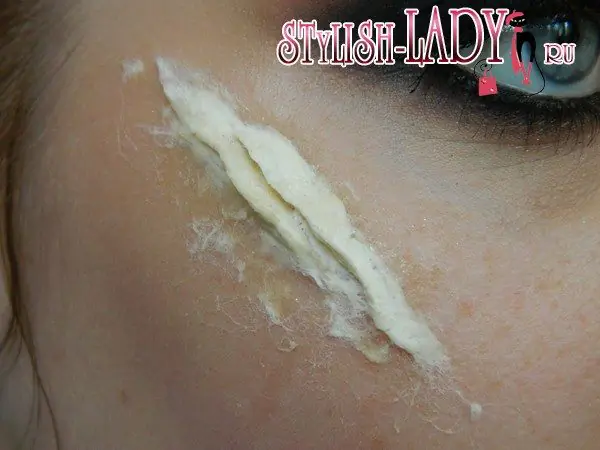
Apply foundation over the entire surface of the wound and smoothly move onto the skin of the face. We also wait for the tone to dry. If you don't let it dry, the paint will mix with it.
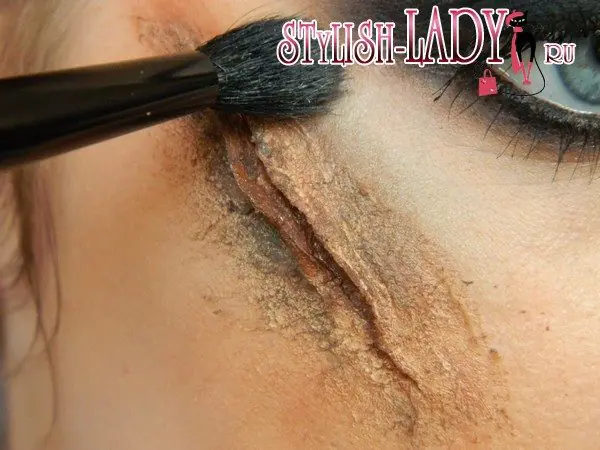
Now our task is to paint over the recesses with dark shades. We paint the space inside with brown face painting. Also, if you have any depressions around the wound, then paint them with a light layer too. After this, we cover the top with face painting of a bloody shade and distribute it with a brush both outside and inside.
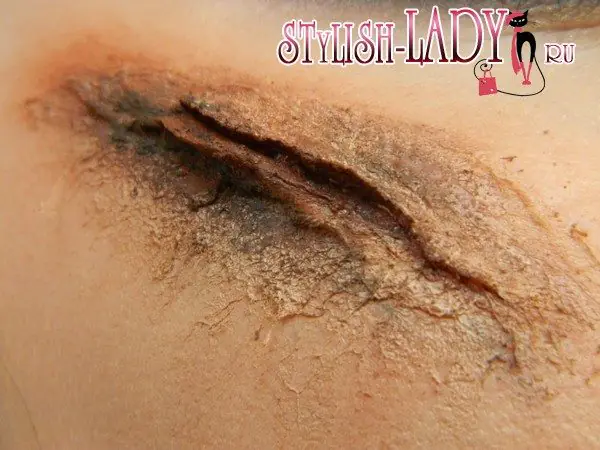
Using blue and green shadows we set the tone around the wound, like a bruise.
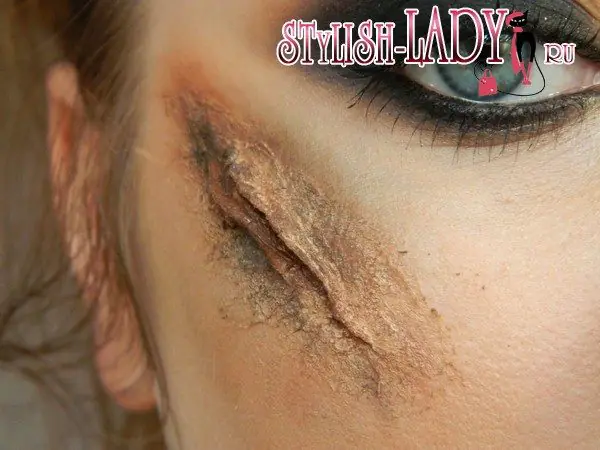
Add artificial blood to the middle of the wound. Due to the dark-colored cavity, the blood will look richer.
Add more blood to smoothly flow over the skin, if necessary. Spread a little blood around the wound.
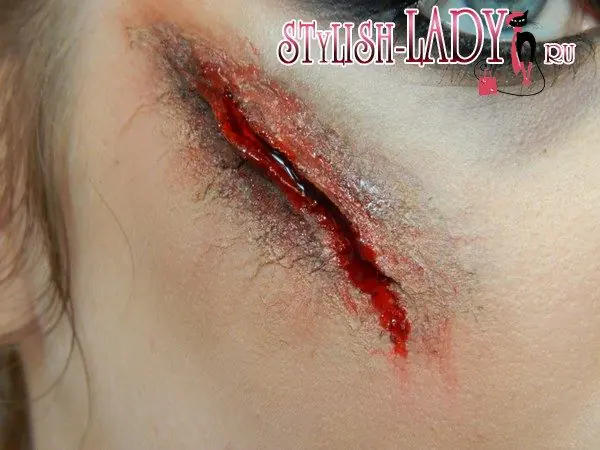
This is how easy it is to create horror on your face. Add a black eye or smudged mascara to your look and your look will definitely become realistic!
