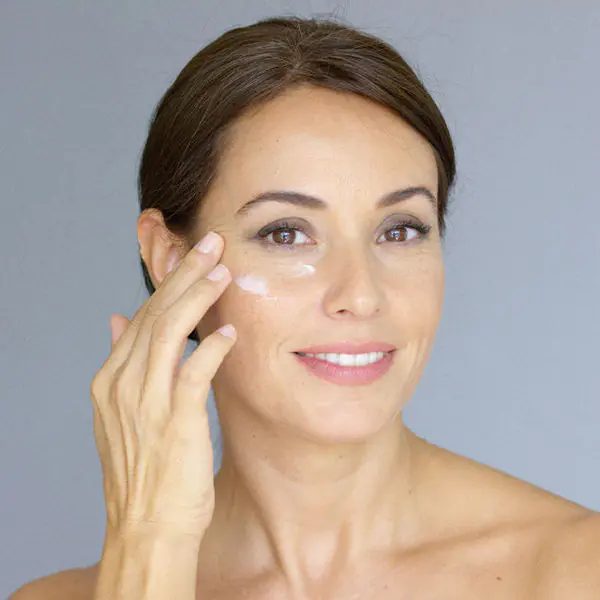
1. Hydration is the key to success
Girls with dry and combination skin, take note that before starting any makeup, the first thing you should do is moisturize your skin. Otherwise, even the smallest wrinkles will smile sarcastically through any makeup. Ideally, choose a moisturizing foundation. Don't forget: the tone should match your skin tone. A color that is too dark will make you look older, and a color that is too light will make you look like one of the characters from the Twilight Saga.
2. Masking with tone
When choosing foundation, avoid oil-based products and choose something with a silky texture.
When applying, start from the cheekbones, then move to the nose, then the chin and forehead. This should be done with gentle movements of the fingertips. You should not apply the tone to the nasolabial folds, just tint the areas around the wrinkles. This will help make your skin smoother.
To remove excess cream, use a sponge to go over the skin, especially in places where wrinkles appear.
3. Should you use concealer?
Absolutely yes. This will help visually even out the skin texture and hide shallow wrinkles. Makeup artists say one of the advantages of concealer is its ability to absorb quickly and last a long time.
4. Eyes are the mirror of the soul
And our souls are always young! To ensure your eyes always sparkle with youth, avoid loose powder, because... it only emphasizes wrinkles. Under-eye circles are well disguised with a light concealer. But if you want to emphasize the beauty of your eyes, outline only the upper eyelid and do not paint over the lower eyelashes, so as not to draw attention to minor age-related imperfections.
Now let's move on to the shadows. To ensure that they last a long time and do not smear, first apply foundation to your eyelids. In shades, give preference to pastel tones, 1-2 shades darker than your skin color. And that is not all! Use a white or beige pencil to draw the mucous membrane of the lower eyelid. Did you do everything right? Then your look will surely shine and conquer all the men of this planet.
5. A smile is our calling card
Yes, yes, everyone knows about it, and we never cease to delight others with a sweet, charming, seductive smile. But what to do with the wrinkles that have formed in the corners of the lips? Don't worry, they can be easily hidden with a light concealer. Gloss will also help make your lips look younger. The shades don’t matter; you can choose the color of your dress, your partner’s tie, or your mood. Just remember to highlight the middle part of your lips with a lighter shade, which will give extra volume to your lips.
6. The role of blush
For anti-aging makeup, blush with a creamy texture that masks rather than emphasizes wrinkles is more suitable. Blush looks very impressive in a combination of two shades: pink - on the “apples”
cheeks and bronze ones - below the cheekbones. This technique will refresh your face, lift your cheekbones, and therefore make your face look younger.
7. Ten hard “no’s” for anti-aging makeup
•Say no to greasy foundation.
•Do not choose a foundation that is too light.
•Do not overuse concealer: apply it only to problem areas with a special brush.
• “Don’t over-powder”: in order not to dry out the skin on the cheeks and under the eyes, and therefore not emphasize wrinkles, apply powder only to the T-zone.
•Do not wear dark eyeliner on the lower eyelid. Otherwise, it will make your eyes look smaller and highlight the circles and wrinkles under your eyes.
•Forget about pearlescent shadows that emphasize facial wrinkles.
•A firm “no” to mascara on the lower eyelashes.
•Avoid greasy and liquid lipsticks, which spread and accumulate in wrinkles, making your face look several years older.
•Do not use dark shades of lipstick: it makes you look old.
•Throw away orange and brown blushes, which look unnatural and draw undue attention to wrinkles.
Follow these simple rules, dear girls! Always remain young, attractive and cheerful! Love yourself, with or without wrinkles!! 
Makeup strobing: step-by-step technique
Our readers successfully use Biorecin to eliminate wrinkles. Seeing how popular this product is, we decided to bring it to your attention.
Read more here...
Dreams of beautiful appearance are common to all women. There are various techniques that help to slightly correct or “correct” the face, for example, backing or primer. Strobing is a type of makeup that allows you to give your face the desired beauty and, most importantly, it can be done in just a few minutes.
The article provides information about who is suitable for facial strobing, describes the technique of performing the procedure step by step and describes the tools that will be needed.
Who is suitable for strobing makeup?
The name of this type of makeup comes from the “strobe” device, which repeats all the bright flashes of light. When doing makeup, this principle works similarly, i.e. shows all the prominent areas on the face and enhances them with color highlighting.
Cream or dry cosmetics are used as such beauty stroboscopes: highlighters, powders (with shimmering particles), blush (with nude or champagne shades), shimmers that create natural pearlescent highlights on the skin.
Strobing makeup is not contour makeup, as most women believe. Facial strobing, unlike contouring, does not meticulously outline all parts of the face and does not serve to create new features using makeup.
Before you try strobing and contouring, learn when strobing and contouring are used, when they look best, and when they are inappropriate or undesirable:
• Strobing makeup looks great in the evening, when the sun's rays do not illuminate the face. It favorably emphasizes the beauty of the skin;
• Professional photographers welcome their models if they use strobing;
• For problem skin, facial strobing is not recommended. if you decide to have it done, you should first remove or not “mask” all imperfections on the skin;
• Women with oily skin should also not use this makeup. If you have oily skin and want to do strobing, you should cleanse your skin first. Then a product is applied that removes shine that occurs from excess sebum.
From the very beginning, the strobing technique was created for models who had to look stunning on the catwalk and at photo shoots. Over time, women and girls who did makeup realized that with the help of this technique you can highlight all the advantages of your face in a few minutes and successfully hide imperfections.
Strobing: step-by-step implementation
Having learned about so many advantages, of course, you will want to do makeup correctly using the strobing technique, it is very simple.
Here are step-by-step strobing instructions and rules to follow:
1. A foundation is applied as a base, which is selected according to skin color;
2. Concealer masks problem areas;
3. Using highlighter, you mark the areas that are exposed to light. They are treated with crumbly highlighter.
4. Cream highlighter is carefully blended on the cheeks. The nose, or rather only the back, stands out to them. Then the product is shaded with a thin brush;
6. The area under the cheekbones is emphasized with a light concealer, this helps to visually create more volume;
7. The next step is to blend the shimmer shadows in the inner corner of the eye and in the middle of the eyelid;
8. Cream highlighter emphasizes the dimple above the upper lip. This is done to make the lips look more voluminous;
9. Matte lipstick is applied;
10. To prevent unwanted oily shine, apply transparent powder.
It should be taken into account that the highlighter is applied in a circular motion, thanks to which peculiar flashes of light are created, the main thing is not to overdo it in the T-zone.
If you do everything right, you will get the perfect DIY makeup. But you will also need some decorative products.
What do you need to have to perform strobing?
Strobing products must be of the highest quality. When purchasing cosmetics and tools, be sure to pay attention to expiration dates and the manufacturer.
Now let's move on to the list of what you will need:
• Cream highlighters;
• Dry (powder) highlighters;
• Contour sticks;
• Powder;
• Brushes;
• Sponges.
If you do everything correctly and select the right products, the result of your makeup will please you. Using the strobing technique gives the face a well-groomed, healthy appearance.
Basic rules of strobing makeup
Here are the main trends in makeup that should be taken into account when creating strobing:
1. No clear lines - the highlighter should be shaded very carefully so that it looks natural.
2. If there are imperfections on the face, they need to be disguised, because... Strobing is performed only on smooth skin. Therefore, if there are rashes, acne, redness on the skin of the face, they should be hidden with a corrector or foundation.
3. If you have dry facial skin, you should use a cream highlighter; if you have combination or oily skin, use a loose highlighter. You can also combine different textures, for example: apply loose powder to the forehead, and cream cosmetics to the drier skin of the cheekbones.
4. The basic rule of strobing is “less is better,” i.e. highlighter should be used to a minimum so that the face does not look too oily.
5. Don't confuse highlighter and bronzer. Bronzers most often contain a reddish or yellow pigment, so they are suitable for highlighting a tan, but not in the case of a light complexion.
As you can see, strobing is an excellent makeup solution for every day, as well as a very simple technique for facial correction.
FAQ
Irina, 19 years old:
Will strobing look as beautiful in the daytime as in the evening?
Expert's answer:
Strobing is not recommended for daytime makeup. In sunlight, excessive glare on the face will look out of place.
Alina, 18 years old:
Is it possible to use strobing makeup to hide reddened inflammation and pimples?
Expert's answer:
Before using the strobing technique, visible skin defects must be hidden using cosmetics (powder, foundation). It is recommended to hide pimples with concealer, and redness with foundation.
Botox
Botox injections are the fastest and easiest way to get rid of mesh around the eyes. Just a couple of units of botulinum toxin can smooth out any wrinkles. The method of action is simple: Botox relaxes the muscles that we tense when we smile, squint in the bright sun or try to see something.
This method copes with both expression and age wrinkles. The only thing is that you need to inject before the lines deepen and deform the deep tissues. The final result after Botox can be assessed two weeks after the procedure, and the effect itself will last from 2-3 months to a year.
Blepharoplasty
Minimally invasive procedures are becoming increasingly popular. Today, blepharoplasty is performed in 40 minutes. Unlike traditional surgery, an incision is made on the inside of the eye (on the mucous membrane), through which the fatty hernia is pulled out - the cause of the appearance of bags under the eyes and folds on the upper eyelid. What’s nice is that a couple of hours after the operation you can return to your normal lifestyle - there will be no swelling or bruises.
Permanent makeup
Few people know that permanent makeup has long been not limited to outlining the eyebrows and the space between eyelashes. Camouflage tattooing is a method of coloring the skin that helps to permanently get rid of dark circles and age spots around the eyes.
The technique is simple and familiar - using a special device, paint of a suitable shade is driven under the skin. The pigment hides traces of lack of sleep and the “panda effect” in one procedure. Bonus: after permanent makeup, wrinkles also become less noticeable, because the tone on the face is evened out, which is similar to applying concealer.
Makeup
Those who still prefer to hide wrinkles with concealer and foundation should also take into account a couple of important nuances. Must-have is a primer or base for makeup around the eyes. The product will fill in wrinkles so that concealer or foundation does not sink deep and highlight imperfections.
Among direct concealers, you should choose fluids or CC creams with a light watery texture. This will help not to overload your makeup and avoid the layering effect.
Home care
To hide crow's feet, sometimes it's enough to moisturize your skin well. It will smooth out quite quickly (an important point - this method is suitable for insolation and lack of fluid, and not for age-related changes, when hydration is also important, but does not solve the problem itself).
Various serums and eye patches will cope with the task. You need to apply patches every morning and do your usual activities - after 15–20 minutes, the skin will be saturated with liquid and will be perfectly smooth.
